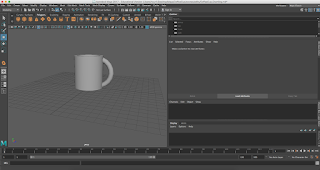
How to create a coffee cup in Maya in 7 easy steps!
How to make a coffee cup in Maya in 7 easy steps!
Create file
1. Go to File>Project window and create a new project name ( make sure it is saving to the right place) and then click accept
2. Save. Go to File>Save scene as or hit Command-S, save it to the scenes folder in your "coffee cup folder". Now you are ready to start modeling!
Cup
3. Start by going to the Polygons toolbar and creating a polygon pipe. Now go to the channel box and set radius to 2.5 and heigh to 11.
4. Next i recommend that you set the x and y translation to 0 to make it completely centered. as well as set the translate y to 2.8 to make it flat to the ground
Handle
5. Next we are going to create the handle for the mug. Start by making a torus about the size you want the handle to be.
6. Next right-click then change into Face mode. Next select half of the torus and then delete it. This creates the handle!
7. Now go into the channel box and set the X, and Y rotations to 90. this flips it on its side and makes it vertical instead of horizontal.
8.Now attach the handle to the Cup. I recommend that it have the same amount of space from the top and bottom

Congratulations you have created a coffee cup in Maya!
6. Next right-click then change into Face mode. Next select half of the torus and then delete it. This creates the handle!
7. Now go into the channel box and set the X, and Y rotations to 90. this flips it on its side and makes it vertical instead of horizontal.
8.Now attach the handle to the Cup. I recommend that it have the same amount of space from the top and bottom

Congratulations you have created a coffee cup in Maya!


Comments
Post a Comment